A new practice opens its doors, sees its first patients, and submits its first claims. Then weeks pass with no payment. The problem is not the care provided. It is a missing enrollment step, an incomplete CAQH profile, or a clearinghouse connection that was never fully set up. By the time the gap is found, cash flow is already strained.
This is one of the most common and most avoidable problems new healthcare practices face. Billing infrastructure takes time to build correctly, and much of that time falls before the first patient ever walks in. Provider enrollment alone can take 60 to 120 days. Software setup, staff training, and payer testing all need to happen before claims start moving smoothly.
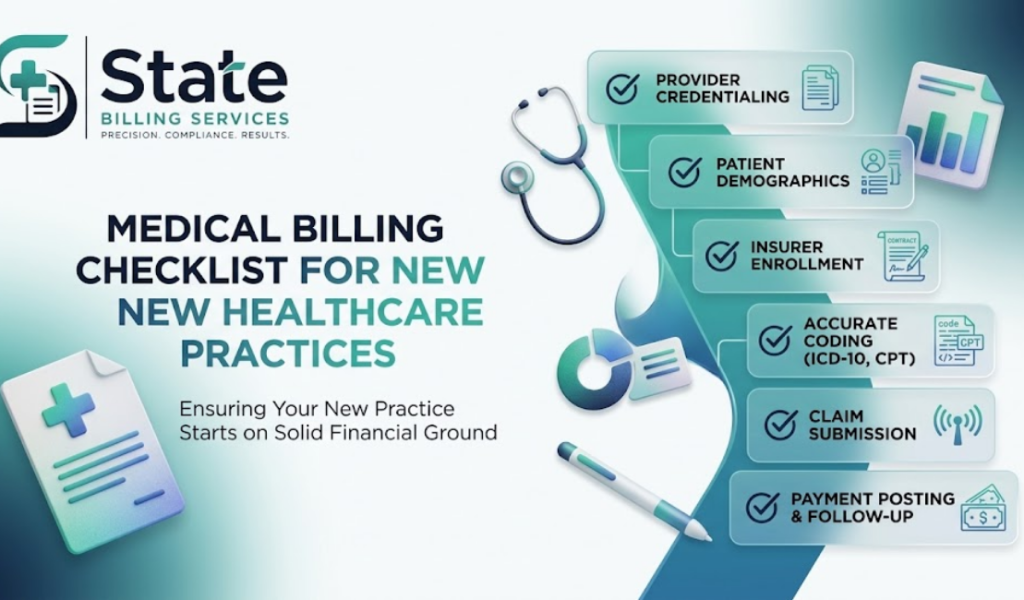
This checklist walks through what a new practice needs to have in place, from credentialing through collections. It covers the administrative groundwork most new owners underestimate, along with where automation and modern billing tools can reduce the burden on a small or newly formed team. The goal is not to overwhelm a new practice with tasks. It is to sequence them correctly so nothing gets missed.
Why Billing Readiness Matters Before Opening Day
A new practice often focuses heavily on clinical setup: hiring providers, choosing an EHR, preparing the physical space. Billing infrastructure sometimes gets treated as a secondary concern, something to figure out after the doors open. This ordering creates problems.
Claims cannot be submitted to most payers until credentialing and enrollment are complete. If a provider starts seeing patients before enrollment finishes, those early claims often cannot be billed retroactively to every payer, depending on the payer’s specific policies. This means real revenue can be lost simply because billing setup started too late.
There is also a compliance dimension. A practice that submits claims without proper NPI registration, payer enrollment, or clearinghouse connections risks claim rejections that look like errors but actually stem from incomplete setup. Sorting this out after the fact takes far longer than building it correctly from the start.
The financial pressure compounds quickly for a new practice. Startup costs are already high, from equipment to staffing to lease payments, and most new practices operate with limited cash reserves during the first several months. A delay in reimbursement caused by incomplete billing setup can strain a budget that was already tight before the first patient was seen. This is one of the clearest reasons billing infrastructure deserves the same early attention as clinical setup, not a lower priority handled after opening.
Step 1: Secure an NPI for the Practice and Each Provider
Every healthcare provider and organization that submits claims needs a National Provider Identifier, or NPI. There are two types. A Type 1 NPI applies to individual providers. A Type 2 NPI applies to the organization itself, such as a group practice or clinic.
New practices need both. Each individual provider needs their own Type 1 NPI if they do not already have one from a previous role. The practice as an entity needs a Type 2 NPI, even if there is only one provider working there initially.
NPI applications are submitted through the National Plan and Provider Enumeration System. Processing is usually fast, often within a few business days, but this step needs to happen early since almost every other enrollment step depends on having a valid NPI in place first.
Step 2: Set Up and Complete a CAQH Profile
CAQH, the Council for Affordable Quality Healthcare, maintains a centralized database that many commercial payers use to collect provider credentialing information. Instead of submitting the same demographic, education, and licensure information separately to each payer, providers complete one CAQH profile that participating payers can access.
A CAQH profile needs to be complete and kept current. Missing documents, expired licenses on file, or unattested information can delay every payer enrollment that relies on that profile. Providers should also re-attest their CAQH information regularly, since payers typically require attestation every 120 days to keep the profile active and usable.
New practices sometimes underestimate how much this single profile affects downstream timelines. A CAQH profile with missing malpractice insurance documentation, for example, can stall multiple payer applications at once, since each payer pulls from the same incomplete file.
It helps to assign one person the ongoing responsibility of maintaining the CAQH profile rather than treating it as a one time setup task. Licenses expire, malpractice policies renew, and practice addresses change. Each of these updates needs to be reflected in the CAQH profile promptly, since an outdated profile can quietly disrupt claims processing months after the initial credentialing was completed.
Step 3: Apply for Payer Enrollment With Medicare, Medicaid, and Commercial Plans
Provider enrollment with each payer is a separate process from licensing or NPI registration. This step confirms the provider is authorized to bill that specific payer and establishes the reimbursement terms.
Medicare enrollment happens through the Provider Enrollment, Chain, and Ownership System, commonly known as PECOS. Medicaid enrollment varies by state and often requires a separate application through the state’s Medicaid agency or its managed care organizations. Commercial payer enrollment typically pulls from the CAQH profile but still requires a direct application and contract negotiation with each payer.
This stage takes the longest. Understanding the typical provider credentialing timeline helps new practices set realistic expectations and avoid scheduling patients with a payer mix the practice is not yet enrolled to bill.
- Confirm which payers are most relevant to the practice’s expected patient population before prioritizing applications
- Submit Medicare and Medicaid applications early, since these often take longer than commercial payer credentialing
- Track application status regularly rather than waiting for payers to reach out with updates
Mistakes during this stage are common enough that reviewing top credentialing mistakes that delay provider enrollment before submitting applications can prevent avoidable delays.
Step 4: Choose Practice Management and EHR Software
The software a practice selects affects nearly every part of the billing workflow that follows. Practice management systems handle scheduling, patient demographics, claims submission, and payment posting. Electronic health record platforms manage clinical documentation. Many newer systems combine both functions, while others require separate platforms that need to integrate.
New practices should evaluate a few specific factors before committing to a system:
- Does the software connect directly to a clearinghouse for claims submission
- Does it support real time eligibility verification
- Does it generate the reports needed to track claim status, denials, and accounts receivable
- Does it integrate cleanly with the EHR if they are separate systems
A system that requires significant manual work to move data between scheduling, documentation, and billing introduces more opportunities for error. Practices should also consider whether the platform supports the specialty they are launching, since specialty specific templates and code sets vary. A mental health billing practice has different documentation and coding needs than an urgent care billing operation, and software built primarily for one may not serve the other well.
Cost structure also matters at this stage. Some platforms charge a flat monthly fee, while others charge per claim or as a percentage of collections. New practices with uncertain early volume should weigh which pricing model fits their expected growth curve, since a percentage based model can scale more predictably during the slower first few months compared to a flat fee that stays the same regardless of claim volume.
Step 5: Establish a Clearinghouse Connection
Clearinghouses act as an intermediary between the practice and insurance payers. They scrub claims for basic formatting errors, translate data into the format each payer requires, and transmit claims electronically. Without a clearinghouse connection, practices are left submitting claims manually, which is slower and more prone to error.
Setting up this connection involves registering with the clearinghouse, confirming which payers the clearinghouse can transmit to, and testing the connection before going live. Many practice management systems have a preferred or built in clearinghouse relationship, which can simplify this step, though practices should still confirm the specific payers they plan to bill are supported.
Testing matters here. Submitting a small batch of test claims, if the clearinghouse offers this option, helps catch formatting or connectivity issues before real patient claims are affected.
New practices should also confirm how the clearinghouse handles claim status reporting. A clearinghouse that provides clear, timely status updates on rejected or pending claims gives billing staff the visibility needed to act quickly, rather than discovering an issue weeks later when a payment fails to arrive as expected.
Step 6: Build the Eligibility Verification Process
Before the first patient is seen, the practice needs a defined process for checking insurance eligibility. This includes confirming active coverage, plan type, copay and deductible information, and whether specific services require prior authorization.
New practices should decide early whether eligibility checks will be automated through the practice management system or handled manually through payer portals and phone calls. Automated real time verification tends to be faster and more consistent, particularly as patient volume grows. Reviewing best practices for patient insurance verification provides a practical framework for building this process correctly from the start.
Step 7: Set Up Coding Standards and Resources
Accurate coding depends on having the right resources and standards in place before claims start going out. This includes current ICD-10, CPT, and HCPCS code references, along with clear internal guidelines for how coding decisions get documented and reviewed.
New practices need to decide whether coding will be handled internally by trained staff or outsourced. For practices launching without a dedicated certified coder on staff, medical coding services can provide accurate, specialty appropriate coding support while the practice builds its internal team.
Coding accuracy also depends on specialty. A practice in orthopedic revenue cycle management or radiology RCM faces different coding complexity than a general internal medicine practice, so coding resources and staff training should reflect the specific services the practice will bill.
Step 8: Define the Claims Submission Workflow
A clear, documented claims workflow reduces errors and keeps new staff aligned as the practice grows. This workflow should cover every stage from patient check-in through final claim submission, including who is responsible for each step.
| Workflow Stage | Responsible Role | Key Check |
| Patient check-in | Front desk | Demographics and insurance card confirmed |
| Eligibility verification | Front desk or billing staff | Active coverage and authorization needs confirmed |
| Documentation | Provider | Clinical notes support planned coding |
| Coding | Coder or coding service | CPT and ICD-10 codes match documentation |
| Claim scrubbing | Billing staff or software | Missing fields and formatting errors caught |
| Submission | Billing staff | Claim sent through clearinghouse within filing window |
A documented medical billing workflow like this gives new staff a clear reference point and reduces the inconsistency that often comes with a small, newly formed team still learning their roles.
Step 9: Prepare for Denial Management From Day One
New practices sometimes assume denial management is something to worry about later, once claim volume increases. In practice, the earlier a denial tracking process is built, the easier it is to catch patterns before they become expensive habits.
Every claim denial should be logged with the reason, the payer, and the resolution. Reviewing medical claim denial reasons before the practice even opens helps staff recognize common denial triggers early, whether that involves eligibility issues, missing authorization, or coding mismatches.
Practices without dedicated denial management staff can also consider SC denial management services to handle this function while internal processes mature.
Step 10: Set Up Payment Posting and Reconciliation
Payment posting needs to be accurate from the first payment received. This means matching each payment to the correct claim, correctly applying adjustments, and identifying any underpayments relative to the expected reimbursement rate.
New practices should decide early how payment posting will be handled, whether through automated matching within the practice management software or manual review by billing staff. South Carolina Payment posting services can support this function for practices that do not yet have dedicated internal staff for this task, ensuring payments are reconciled correctly from the start rather than requiring cleanup later.
Step 11: Establish an Accounts Receivable Follow-Up Process
Unpaid and aging claims need consistent follow-up. Without a defined process, claims can sit unresolved for months, quietly reducing revenue the practice has already earned but not collected.
New practices should set clear timelines for follow-up, such as checking claim status at 14 days, 30 days, and 45 days if payment has not been received. AR recovery services in SC can support this process for practices without the internal bandwidth to track aging claims consistently during the early months of operation.
Step 12: Build a Compliance and Documentation Framework
Compliance cannot wait until an audit notice arrives. New practices should establish documentation standards, HIPAA compliant processes for handling patient information, and a basic compliance framework before opening.
This includes training staff on documentation timing, medical necessity standards, and proper handling of protected health information. Reviewing HIPAA compliance tips for medical billing teams gives new practices a starting point for building these standards into daily operations from the beginning, rather than retrofitting compliance measures after a problem surfaces.
Step 13: Plan for Prior Authorization Management
Services requiring prior authorization will be denied if that step is missed, regardless of how accurate the rest of the claim is. New practices need a system for identifying which services require authorization by payer and building that check into the scheduling process.
Prior authorization services in SC can manage this step for practices that do not yet have staff dedicated to tracking payer specific authorization requirements, which is particularly useful during the early months when front desk staff are still learning payer specific rules.
Step 14: Understand State Specific Billing Requirements
Billing rules are not identical across every state, particularly for Medicaid programs. New practices should review state specific guidance relevant to their location, since coding charts, reimbursement rates, and documentation requirements can differ meaningfully from general commercial payer rules. Practices operating in or near Colorado, for example, may find value in reviewing this Colorado Medicaid CPT code billing and chart guide as an example of how state specific billing charts are structured, even if the practice operates in a different state with its own equivalent guidance.
Step 15: Decide Between In-House and Outsourced Billing
New practices face a real decision point early on: build an internal billing team or outsource part or all of the function to a specialized partner. Both paths can work, but the right choice depends on patient volume, available capital, and how quickly the practice expects to grow.
Understanding the hidden costs of in-house medical billing, including staffing, software licensing, and ongoing training, helps new practices make this decision with clearer financial visibility. For practices unsure which direction fits best, this comparison of in-house versus outsourced medical billing walks through the tradeoffs in more detail.
Step 16: Set Up Reporting and KPI Tracking From the Start
New practices benefit from tracking key billing metrics from their very first claims, rather than waiting until problems surface. Clean claim rate, denial rate, days in accounts receivable, and net collection rate all give early signals about whether the billing setup is working as intended.
Reviewing medical billing KPIs early helps new practice owners understand what normal performance looks like and catch deviations before they become significant revenue problems. A practice that waits six months to start tracking these numbers loses the ability to catch early setup issues while they are still small and easy to correct.
Common Mistakes New Practices Make
A few mistakes show up repeatedly among new practices building their billing infrastructure for the first time.
- Starting to see patients before payer enrollment is confirmed complete
- Leaving the CAQH profile incomplete or failing to re-attest on schedule
- Choosing software without confirming clearinghouse and EHR compatibility
- Underestimating how long Medicaid and Medicare enrollment actually takes
- Delaying denial tracking until claim volume is already high
Avoiding these issues largely comes down to sequencing. Credentialing and enrollment need to start well before opening day. Software and clearinghouse setup need to be tested before real claims depend on them. Staff training and workflow documentation need to happen before volume increases enough that mistakes become expensive.
Bringing the Checklist Together
None of these steps function well in isolation. An NPI without a completed CAQH profile stalls payer enrollment. A clearinghouse connection without accurate coding still produces denials. A defined workflow without staff training breaks down as soon as volume increases.
New practices that treat billing readiness as a connected system, built out before opening day, tend to see revenue flow more smoothly once patients start coming in. This reduces the early cash flow strain that catches many new practices off guard and sets a stronger foundation as the practice grows, whether that means adding providers, expanding into a new specialty, or increasing patient volume over time.
Final Thoughts
Opening a new healthcare practice involves far more billing groundwork than most owners expect. NPI registration, CAQH credentialing, payer enrollment, software selection, clearinghouse setup, and compliance planning all need to happen before the first claim can move smoothly through the system. Skipping or rushing any of these steps tends to surface later as delayed payments, denied claims, or compliance gaps that take far longer to fix than to prevent.
For practices that want experienced support building this foundation correctly from the start, States Billing Services SC works with new and growing practices to manage credentialing, claims, denial prevention, and revenue cycle setup from day one.